Many people still ask me what the best methods are for adding bracing to steel models.
Some are still using beams to try and model bracing, others get into a bit of a mess with vertical bracing, and many struggling with the representation on drawings.
Therefore, I thought it was about time I created a Revit training tutorial on this, covering horizontal bracing, vertical bracing, and some typical connections for adding those all-important details.
First, we need to look at some of the basics. Below you can see examples of Vertical, Horizontal and Roof Bracing.
When creating vertical bracing, it’s ideal to create a framing elevation which provides an elevation of a few hundred millimetres deep and sets a working plane for the bracing.
Use the dedicated brace command to efficiently add bracing.
This enables you to roughly sketch the required bracing and then use the Properties Palette to fine tune the exact location of the bracing.
In the image below, you can see some vertical X-bracing with the start and end attachments attached to the correct levels, with the option of adding offsets from each of these levels.
I have used the Equal Angle to create the bracing, with both angles in the same plane, hence the clash.
This can easily be resolved by using the y offset value on each member. The analytical line remains centred, but the physical elements will be located correctly.
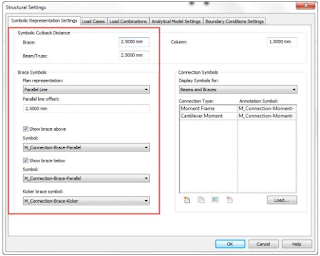
The bracing is automatically represented in a plan view and can be marked. The standard in the UK is to show a parallel line on the outside for bracing above and a parallel line on the inside for bracing below.
You can control the type of representation and spacing in the Structural Settings dialog box.
Finally, if you want to tidy up the bracing and make the drawings look a little better you can either use 2D detail components to represent a connection or use the connection tools to add 3D connections.
This is just one area you will learn more about by attending one of our Excitech’s Revit Training courses.
This article was originally posted on the Revit Structures Blog page.


No comments:
Post a Comment